Международное название:
Синонимы:
Характеристики:
| Сложность: | |
| Цикл развития: | |
| Световой режим: | |
| Режим полива: | |
| Температура: | |
| Почва: | |
| Ключевая черта: |
Цвет листвы
Цвет бутонов
Размеры цветка
Систематика:
| Домен: | |
| Царство: | |
| Отдел: | |
| Класс: | |
| Порядок: | |
| Семейство: | |
| Род: |
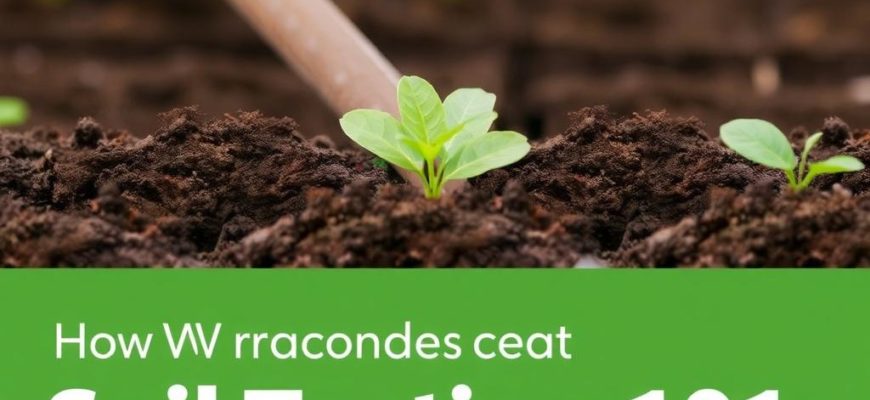
Soil testing can feel like decoding a foreign language the first time you open a lab report. Numbers, acronyms, and unfamiliar units stare back at you: ppm, meq/100g, base saturation, and buffer pH. But once you learn the key pieces, soil tests become one of the most powerful tools in your gardening or farming toolbox. They tell you where the soil is healthy, where it’s missing nutrients, and what small — or large — changes will give you stronger plants, higher yields, and less waste. This guide walks you through everything: how to collect a reliable sample, what common lab terms mean, how to interpret typical results, and concrete actions you can take to improve your soil. No jargon-heavy lecture — just practical, conversational advice you can use right away.
- Why Test Your Soil?
- When and How Often to Test
- Collecting a Good Soil Sample
- What You’ll Need
- Step-by-Step Sampling
- Common Sampling Mistakes
- What Tests Are Available and What They Measure
- Basic Soil Test (Common for Gardens)
- Comprehensive Tests
- DIY Kits and Sensors
- Understanding a Typical Lab Report: Key Terms and Units
- Common Units and What They Mean
- Interpretation Categories
- Why Nitrogen Isn’t Always in a Basic Soil Test
- How to Interpret Numbers — Practical Ranges and What to Do
- Reading Recommendations: Lime, Fertilizer, and More
- Lime (to raise pH)
- Sulfur (to lower pH)
- Phosphorus and Potassium
- Nitrogen Management
- Micronutrients: When They Matter and How to Fix Them
- Organic Matter, CEC, and the Big Picture
- Soil Contamination: Lead and Other Toxins
- Example: Interpreting a Sample Report (Walkthrough)
- Practical Amendments: What to Use and How Often
- Action Plan: From Test to Healthy Soil
- Timing and Seasonal Tips
- Common Questions and Mistakes
- Why didn’t my fertilizer fix the problem?
- My phosphorus test is high — should I stop fertilizing?
- Can I just add compost and skip fertilizers?
- Are online “soil test” services accurate?
- Technology and the Future: Sensors, Apps, and Precision Testing
- Where to Get Help
- Checklist: From Sampling to Action
- Quick Conversion Tips
- Final Practical Example: A Seasonal Plan for a Vegetable Garden
- Resources and Further Reading
- Conclusion
Why Test Your Soil?
Testing soil is like getting a health checkup for your garden. Without it, you’re guessing: adding fertilizer that might be unnecessary, ignoring a pH problem, or missing a toxic metal issue. A good soil test saves money, protects the environment, and leads to better plant health. Whether you grow a backyard vegetable patch, maintain a lawn, or manage acres of cropland, a soil test tells you:
- Which nutrients are deficient or excessive
- Whether pH is in the right range for your plants
- How much lime or sulfur might be needed to adjust pH
- Whether organic matter or drainage needs improvement
- If there are contaminants like lead that need addressing
Testing gives you a baseline. Once you act on that baseline, future tests help you track progress and fine-tune management.
When and How Often to Test
Timing matters for meaningful results. For many garden and lawn situations:
- Test every 2–3 years for established lawns and gardens.
- Test annually for high-value crops or if you’re making big changes (e.g., adding lime, major fertilization, or changing crop rotation).
- Sample in the same season each time — many people test in late winter or early spring before planting.
For new beds or major landscape changes, test before planting so you can correct pH and nutrient issues in advance.
Collecting a Good Soil Sample
A lab is only as good as the sample you send. Follow a consistent method and you’ll get reliable, useful results.
What You’ll Need
- Clean trowel, soil probe, or spade
- Clean bucket (plastic is fine)
- Paper bags or clean plastic sample bags (avoid contaminating with fertilizer bags)
- Permanent marker and sample forms from the lab
- Gloves
Step-by-Step Sampling
- Divide the field or garden into uniform areas based on soil type, slope, crop, or management. For most backyard gardens, treat the whole bed as one area. For larger or varied fields, break into 1–5 acre zones.
- Remove surface residue (mulch, large plant debris) where you collect samples.
- Collect 10–15 subsamples from each area — in a zigzag pattern — to a uniform depth (commonly 6 inches for gardens, 4 inches for lawns, and 6–8 inches for many crops; deeper for root crops or subsoil testing).
- Combine subsamples in the bucket and mix thoroughly. Take a 1–2 cup composite sample and place into the sample bag.
- Label the bag carefully and fill out the lab form with details: crop, previous amendments, irrigation, and any concerns (poor growth, yellowing, suspected contamination).
- Send the sample to the lab promptly — some tests are best run within a few days.
Common Sampling Mistakes
- Taking only one or two probes instead of many subsamples, which misrepresents variability.
- Contaminating samples with fertilizer, pet waste, or rusty tools.
- Sampling wet soil after heavy rain — wait a couple of days so you’re sampling at typical moisture.
- Mixing very different areas (e.g., shady vs sunny, composted vs bare ground) — keep them separate.
What Tests Are Available and What They Measure
Soil labs offer different packages. Understanding the common tests helps you choose the right panel.
Basic Soil Test (Common for Gardens)
- pH — acidity or alkalinity (scale 0–14; most plants prefer 6.0–7.0)
- Phosphorus (P) — usually reported as ppm
- Potassium (K) — reported as ppm
- Calcium and magnesium — often reported or used to calculate base saturation
- Organic matter — percent of soil by weight
- Recommendations for lime or fertilizer based on crop
Comprehensive Tests
- Cation Exchange Capacity (CEC) — soil’s ability to hold and exchange nutrients
- Base saturation — percent of exchange sites occupied by Ca, Mg, K, Na
- Micronutrients — iron (Fe), manganese (Mn), zinc (Zn), copper (Cu), boron (B), molybdenum (Mo)
- Soluble salts / electrical conductivity (EC) — salinity problems
- Buffer pH or lime requirement — how much lime needed to raise pH
- Lead and heavy metal screening — important for urban soils or near industrial sites
DIY Kits and Sensors
At-home kits and electronic sensors can give quick indication of pH, nitrogen, phosphorus, and potassium. They’re helpful for trends and quick checks, but a reputable lab is more reliable for precise management decisions.
Understanding a Typical Lab Report: Key Terms and Units
When your results arrive, the report usually includes numbers, categories (low, medium, high), and recommendations. Here’s how to read it.
Common Units and What They Mean
- ppm — parts per million; often used for phosphorus and potassium.
- meq/100g — milliequivalents per 100 grams; used for exchangeable cations like calcium, magnesium, and potassium.
- CEC (meq/100g) — shows how many cation exchange sites are available to hold nutrients.
- % — percent, used for organic matter and base saturation.
- lbs/acre — mass of nutrient on an acre basis; common in agricultural recommendations.
Interpretation Categories
Labs typically classify nutrient levels as Very Low, Low, Medium, High, or Very High. These categories drive recommendations. For example, “Low” P suggests adding phosphorus fertilizer; “High” suggests no P and sometimes reducing or stopping phosphate applications.
Why Nitrogen Isn’t Always in a Basic Soil Test
Unlike phosphorus and potassium, nitrogen levels in soil fluctuate quickly due to microbial activity, crop uptake, and leaching. Many labs don’t include total soil nitrogen in basic tests; instead, they estimate nitrogen needs based on crop type, organic matter, and previous crop history.
How to Interpret Numbers — Practical Ranges and What to Do
Below is a general reference table for common garden soil nutrients. These ranges are broad and serve as an example; consult your local extension for region-specific recommendations.
| Nutrient | Typical Unit | Low | Medium | High | Common Action |
|---|---|---|---|---|---|
| Soil pH | pH | <6.0 | 6.0–7.0 | >7.5 | Apply lime if low; sulfur or acidifying measures if too high for plants |
| Phosphorus (P) | ppm (Bray or Olsen method) | <10 (low) | 10–30 (medium) | >30 (high) | Apply P fertilizer if low; skip if medium/high |
| Potassium (K) | ppm | <80 (low) | 80–200 (medium) | >200 (high) | Apply K fertilizer if low; monitor if high |
| Calcium (Ca) | meq/100g | <5 (low) | 5–10 (medium) | >10 (high) | Usually tied to lime and pH management |
| Magnesium (Mg) | meq/100g | <1.5 (low) | 1.5–3 (medium) | >3 (high) | May add Mg (e.g., dolomitic lime) if low |
| Organic Matter | % | <2% | 2–5% | >5% | Add compost, cover crops to increase if low |
| Micronutrients (Zn, Mn, Fe, Cu) | ppm | Varies by element | Varies | Varies | Apply chelated or soil-applied micronutrients if deficient; watch for toxicity if excessive |
Note: The test method matters for P and K values; the lab should tell you which extraction method was used (Bray, Olsen, or Mehlich methods) and which crops the recommendations are tailored to.
Reading Recommendations: Lime, Fertilizer, and More
When the lab suggests “apply lime” or “apply 2 lbs of P/1000 sq ft,” understand the context.
Lime (to raise pH)
- Recommendations often show tons/acre or lbs/1000 sq ft. They take into account current pH, target pH, and soil buffering capacity (how much the soil resists pH change).
- Buffer pH tests or CCE (calcium carbonate equivalent) are used to estimate how much lime will be effective.
- Lime works slowly — expect 3–6 months for full effect, and sometimes multiple applications over a year.
Sulfur (to lower pH)
- Elemental sulfur is used to lower pH in alkaline soils, but it relies on microbial conversion to sulfuric acid. It can take months to fully act and needs warm, moist conditions.
- Aluminum sulfate acts faster but can be risky and is usually recommended for small areas or specific ornamental uses under expert guidance.
Phosphorus and Potassium
- Follow lab recommendations. Many labs give amounts per 1,000 sq ft or per acre. For gardens, convert acres to square feet carefully (1 acre = 43,560 sq ft).
- Overapplying phosphorus can cause runoff pollution; apply only what’s needed.
- Use banding (placing fertilizer near seeds or roots) to increase efficiency rather than broadcasting in some crop systems.
Nitrogen Management
- Because N is mobile, labs usually recommend rates based on crop, yield goal, previous crop, and organic matter. Work with local extension recommendations.
- Split applications are often more efficient (e.g., apply part at planting, part during growth).
Micronutrients: When They Matter and How to Fix Them
Micronutrient deficiencies are common in very acidic or very alkaline soils, or where organic matter is low.
- Zinc deficiency often shows as stunted growth and chlorosis, especially in corn and legumes. Zinc sulfate or chelated zinc can correct it.
- Iron deficiency (chlorosis with green veins) is common in high pH soils; iron chelates or foliar sprays can help.
- Boron is essential for flowering and fruit set; both deficiency and toxicity are possible — apply carefully.
Always follow lab guidance and consider foliar applications for fast correction in high-value crops; root applications may be better for long-term correction.
Organic Matter, CEC, and the Big Picture
Organic matter (OM) is the single most important long-term lever you have for soil health. It improves structure, water retention, nutrient holding capacity, and cation exchange capacity (CEC).
- Low OM (<2%): Work to build OM by adding compost, cover cropping, and reducing tillage.
- Moderate OM (2–5%): Maintain with annual compost and diverse crop rotations.
- High OM (>5%): Great for structure and nutrient cycling — continue sustainable practices.
CEC varies with soil texture and OM — clay and high OM soils typically have higher CEC and can hold more nutrients for plant use. Low CEC soils (sandy soils) often need lower, more frequent fertilizer applications.
Soil Contamination: Lead and Other Toxins

Urban gardeners should test for lead, arsenic, and other heavy metals if the property has a history of lead paint, industrial use, or old orchards treated with arsenical pesticides. If lead is elevated:
- Avoid growing edible root crops in contaminated soil.
- Use raised beds with clean soil or barrier layers (landscape fabric plus clean fill).
- Maintain neutral to slightly alkaline pH and high organic matter to reduce lead uptake by plants.
- Wash produce well and peel root vegetables if necessary.
If tests show contamination, contact local extension or public health departments for guidance.
Example: Interpreting a Sample Report (Walkthrough)
Imagine a lab returns this simplified report for a vegetable garden:
- pH: 5.5 (Low)
- Phosphorus (P): 8 ppm (Low)
- Potassium (K): 90 ppm (Medium)
- Organic Matter: 1.6% (Low)
- CEC: 8 meq/100g (Low/Medium)
What to do?
- Raise pH: Apply lime to reach a target pH of 6.5. The lab might suggest 3 lbs/100 sq ft of lime (example). Apply and till lightly or work into beds; expect gradual change over months.
- Add phosphorus: Apply a phosphorus fertilizer according to lab recommendations — for a small garden this may be bone meal, rock phosphate, or a balanced granular starter with careful attention to rates. Consider applying the P where seeds/roots will be (banding) for better uptake.
- Manage potassium: K is medium; maintain with routine compost applications or a modest K fertilizer if you plan heavy-feeding crops.
- Increase organic matter: Add compost annually (1–2 inches topdressed then worked in) and plant cover crops in off-season to build OM and CEC over time.
If the lab’s lime recommendation seems high or if you have restrictions (e.g., pH-sensitive plants), consult your local extension before applying large quantities.
Practical Amendments: What to Use and How Often
Here’s a quick reference table of common amendments and their primary uses.
| Amendment | Main Use | How It Works | Notes |
|---|---|---|---|
| Calcitic lime | Raise pH; add calcium | Neutralizes acidity; supplies Ca | Slow-acting; best applied before planting season |
| Dolomitic lime | Raise pH; add Ca and Mg | Neutralizes acidity; supplies Mg as well | Use if Mg is low; check Mg recommendations |
| Elemental sulfur | Lower pH | Microbes convert S to sulfuric acid over months | Works slowly; warm, moist conditions help |
| Gypsum | Improve sodium-affected soils, add Ca | Supplies calcium without changing pH much | Useful in sodic soils; not a general pH adjuster |
| Compost | Increase OM, nutrients, and microbial life | Slow release of nutrients; improves structure | Apply annually; quality matters (well-rotted) |
| Commercial NPK fertilizers | Correct specific nutrient deficiencies | Supply N, P, K in specific ratios | Follow lab and label recommendations; avoid overapplication |
| Micronutrient chelates | Correct tracer element deficiencies | Provide soluble, plant-available micronutrients | Apply carefully to avoid toxicity |
Always follow manufacturer instructions and local guidance. When in doubt, smaller, incremental adjustments reduce risk.
Action Plan: From Test to Healthy Soil
Turn your soil test into a plan with clear steps:
- Read the report and highlight low or very low nutrients and pH problems.
- Decide which issues are short-term (e.g., top-dress nitrogen) and which are long-term (increase organic matter, lime applications).
- Choose amendments and calculate the rate for your area (convert lbs/acre to your garden’s square feet if needed).
- Apply amendments at the recommended time — lime in fall or early spring, compost anytime with planning.
- Use application methods that fit your crop — banding for row crops, broadcasting for lawns, or side-dress for vegetables.
- Retest on a set schedule (2–3 years for general maintenance, sooner if making big changes).
Timing and Seasonal Tips
- Fall is a great time to apply lime so it can begin reacting over winter.
- Spring is often used for P and K applications before planting, especially if the soil test shows deficiency.
- Apply nitrogen in split doses during the growing season to reduce leaching and improve uptake.
- Compost and organic amendments can be added anytime but are especially beneficial in fall or spring when working beds.
Common Questions and Mistakes
Why didn’t my fertilizer fix the problem?
Because nutrients interact. For example, very low pH can lock up phosphorus and micronutrients, making them unavailable even if present. Correct pH and add organic matter to improve overall nutrient availability.
My phosphorus test is high — should I stop fertilizing?
If the lab reports high or very high P, avoid adding more phosphorus. Excess P can harm aquatic ecosystems if it runs off. Use P-free fertilizers or focus on improving soil biology and organic matter.
Can I just add compost and skip fertilizers?
Compost is excellent for long-term soil health and supplies many nutrients slowly, but it may not provide enough of specific nutrients needed for some high-demand crops in the short term. Use both strategies: compost for long-term resilience and targeted fertilizers for immediate needs.
Are online “soil test” services accurate?
Reputable university extension labs and accredited commercial labs are the most reliable. Some online mail-in services are good too. Local extension services often provide the best region-specific recommendations.
Technology and the Future: Sensors, Apps, and Precision Testing
Soil sensors and apps are improving. In-field EC sensors, moisture probes, and smartphone-assisted colorimetric pH tests can give real-time feedback. For precision agriculture, variable-rate applications based on grid sampling and GPS can optimize inputs by zone. For most home gardeners, however, a traditional lab test paired with observations and regular compost applications is sufficient.
Where to Get Help

If you’re unsure, contact:
- Your county or state extension service — they often provide testing or can recommend labs and interpret results for local crops.
- Master Gardener programs — volunteers trained by extension who can help interpret home garden reports.
- Reputable commercial soil testing labs — check that they use recognized methods and provide clear recommendations.
Checklist: From Sampling to Action

- Plan sampling areas and timing.
- Collect 10–15 subsamples per zone to a consistent depth.
- Mix and send a well-labeled composite sample to a reputable lab.
- Read report carefully; note pH, P, K, OM, CEC, and micronutrients.
- Act on recommendations: lime, add nutrients, add compost, address contaminants.
- Retest on schedule and adjust management accordingly.
Quick Conversion Tips
- 1 acre = 43,560 square feet
- To convert lbs/acre to lbs/1,000 sq ft, divide by 43.56
- For small gardens, many lab recommendations allow direct conversion to lbs/1000 sq ft — scale to your bed size.
Final Practical Example: A Seasonal Plan for a Vegetable Garden
- Late Winter: Collect samples and send to the lab.
- Early Spring: Receive report. Apply recommended lime if pH low. Apply P and K if low, based on recommendation. Incorporate compost into beds.
- Planting Time: Use starter fertilizer only if needed. Side-dress nitrogen based on crop needs.
- Growing Season: Monitor for visual deficiencies; use foliar feeds for quick micronutrient fixes if recommended.
- Fall: Add a thick layer of compost or plant cover crops to build organic matter and protect soil.
Resources and Further Reading
Seek out material from university extensions (search your state extension plus “soil test”), Master Gardener publications, and reputable gardening books that emphasize soil biology and sustainable nutrient management. Local extension offices often provide fact sheets tailored to your region’s soil types and crops.
Conclusion
Soil testing is the most practical, cost-effective way to stop guessing and start managing your land with confidence — from backyard gardens to commercial fields — and turning a stack of numbers into real, targeted actions will improve plant health, save money, and protect the environment.
Оценивайте статью, делитесь материалом с друзьями в социальных сетях, а также высказывайте свое мнение в обсуждении ниже! ![]()